> ## Documentation Index
> Fetch the complete documentation index at: https://docs.preview.x6.ai/llms.txt
> Use this file to discover all available pages before exploring further.
# LobeChat
> 本文档仅供参考,演示如何配置我们的 API 与第三方 AI 聊天界面配合使用。文中提及的任何第三方软件、网站或服务均非由我们运营、控制或背书。
# **LobeChat 简介**
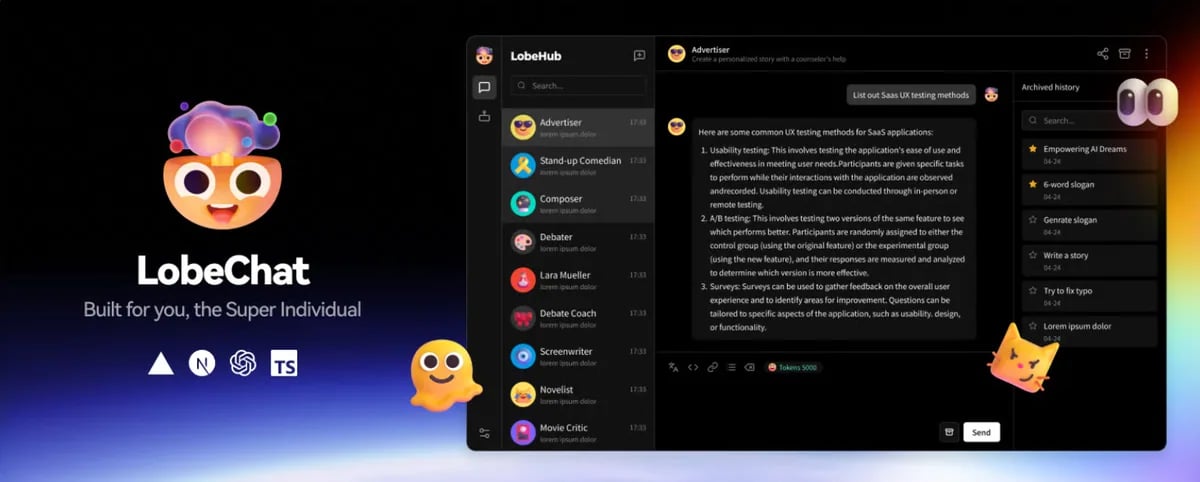 [**LobeChat**](https://lobechat.com) 是一个开源的多模态 AI 聊天平台与框架,作为各类大语言模型(LLM)的统一接入界面。它被设计为一个个人 AI"操作系统",允许用户通过单一、连贯的界面访问、编排并使用不同的 AI 模型与工具。
核心特性:
* 通过 OpenRouter 协议支持多家提供商的模型
* 可扩展功能的插件生态
* 可定制的会话管理
* 跨平台访问
# 步骤
打开 [https://lobechat.com](https://lobechat.com),使用你偏好的方式登录(GitHub、Google 或邮箱等)。根据个人偏好完成账号设置。
[**LobeChat**](https://lobechat.com) 是一个开源的多模态 AI 聊天平台与框架,作为各类大语言模型(LLM)的统一接入界面。它被设计为一个个人 AI"操作系统",允许用户通过单一、连贯的界面访问、编排并使用不同的 AI 模型与工具。
核心特性:
* 通过 OpenRouter 协议支持多家提供商的模型
* 可扩展功能的插件生态
* 可定制的会话管理
* 跨平台访问
# 步骤
打开 [https://lobechat.com](https://lobechat.com),使用你偏好的方式登录(GitHub、Google 或邮箱等)。根据个人偏好完成账号设置。
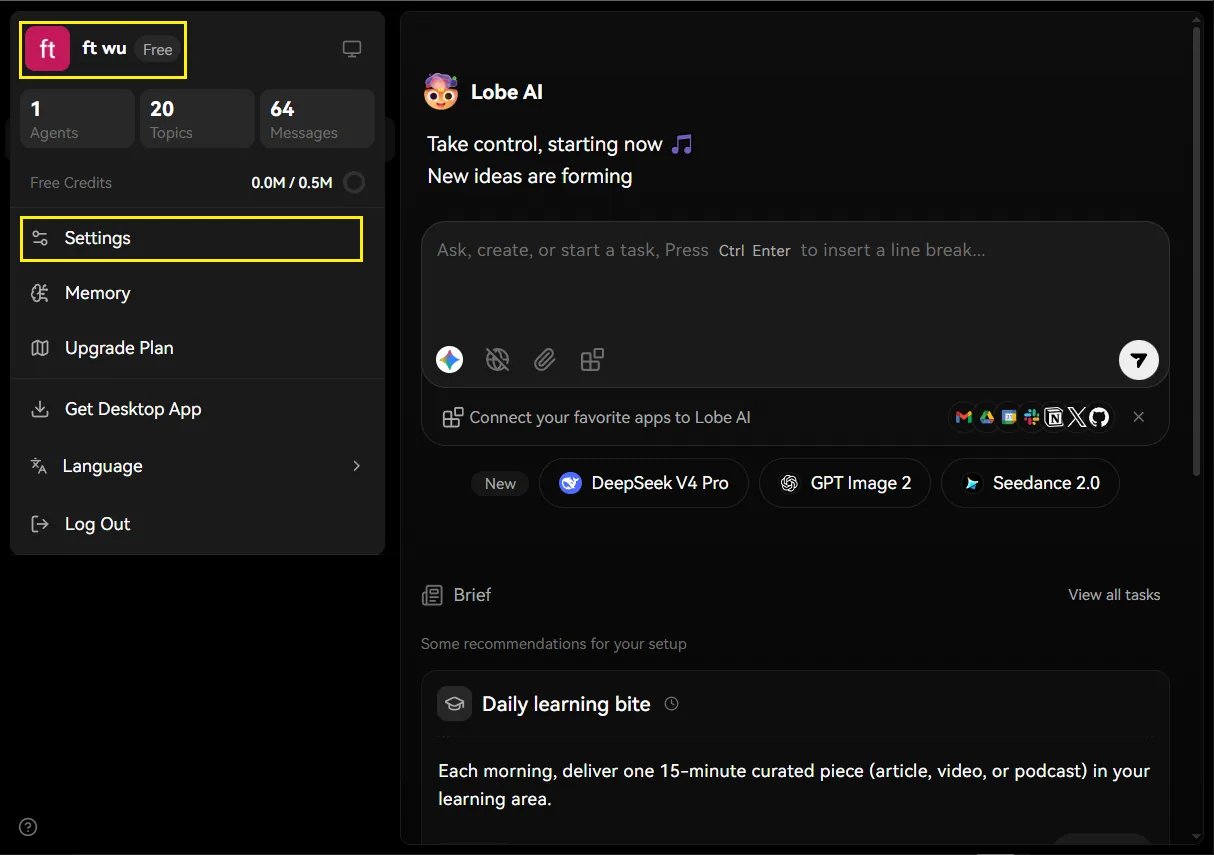
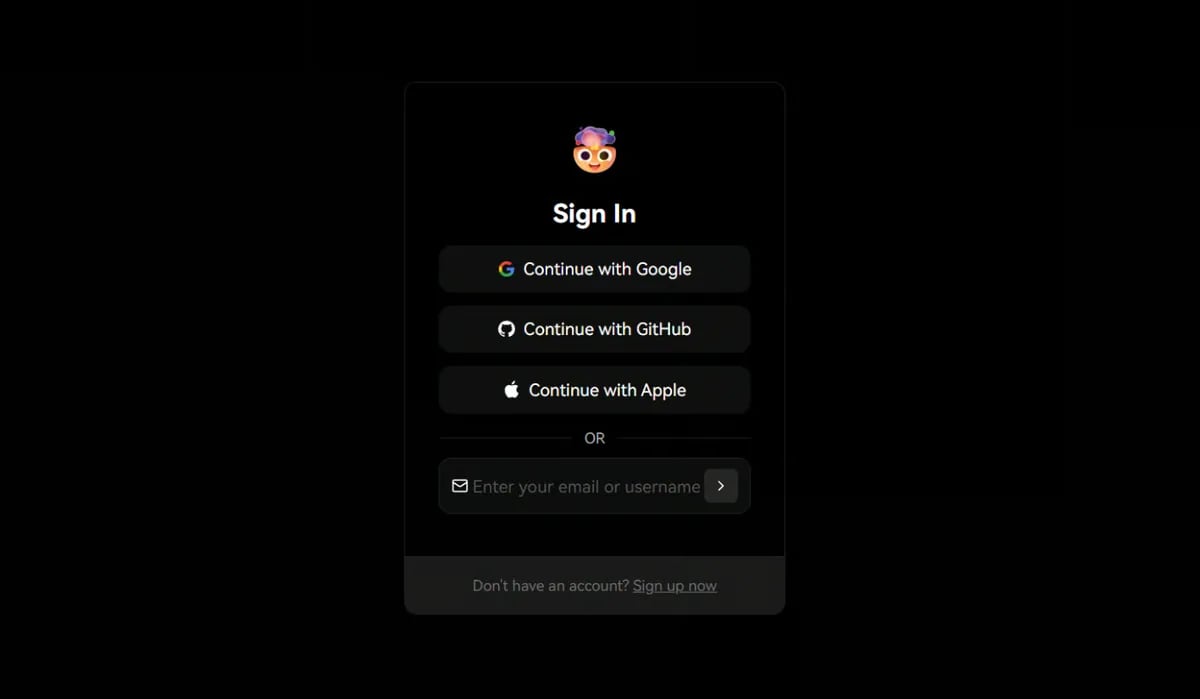 1. 在界面左上角找到并点击你的 **用户头像**。
2. 在下拉菜单中选择 **"Settings"**。
1. 在界面左上角找到并点击你的 **用户头像**。
2. 在下拉菜单中选择 **"Settings"**。
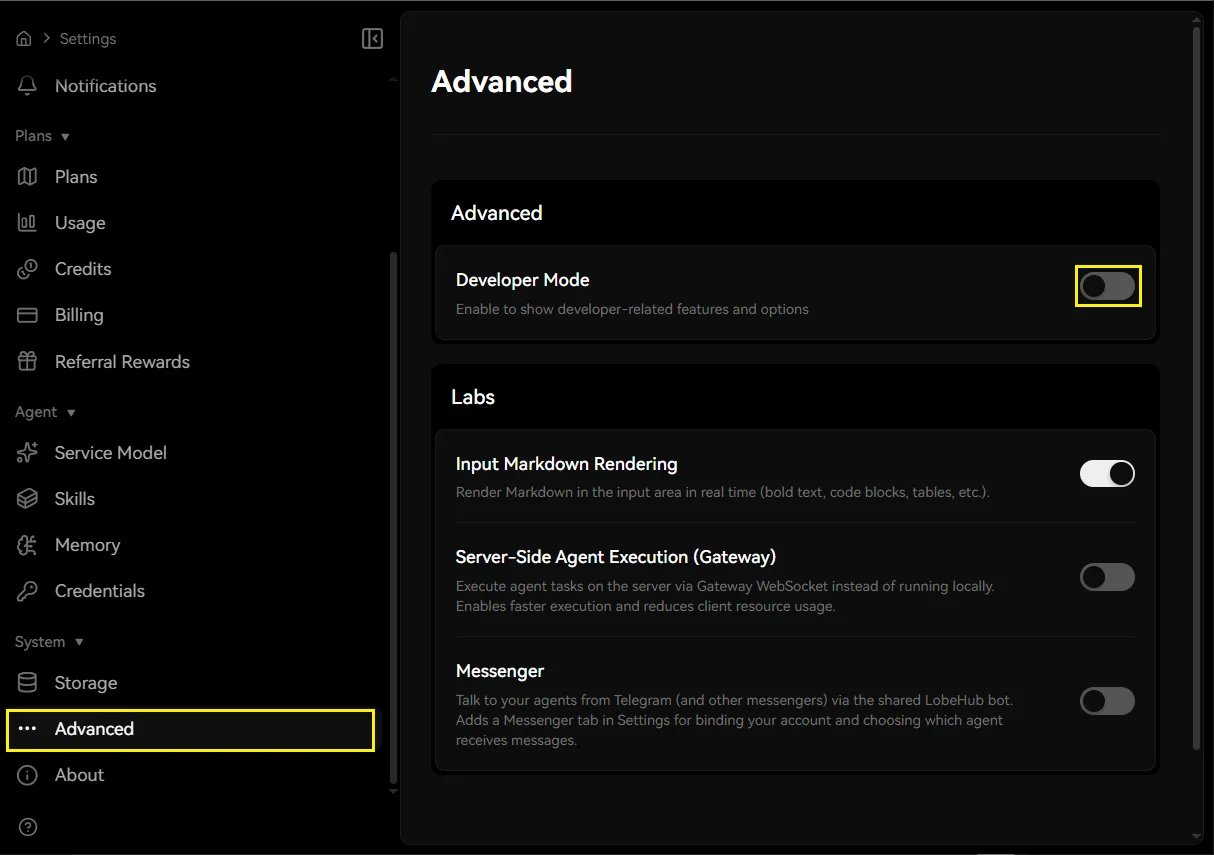
 3. 在 Settings 面板的左下角侧栏中,进入 **"Advanced"**。
4. 开启开发者模式(Developer Mode)。
3. 在 Settings 面板的左下角侧栏中,进入 **"Advanced"**。
4. 开启开发者模式(Developer Mode)。
 点击 Provider → OpenRouter,然后配置 API Key 和 API Proxy URL:
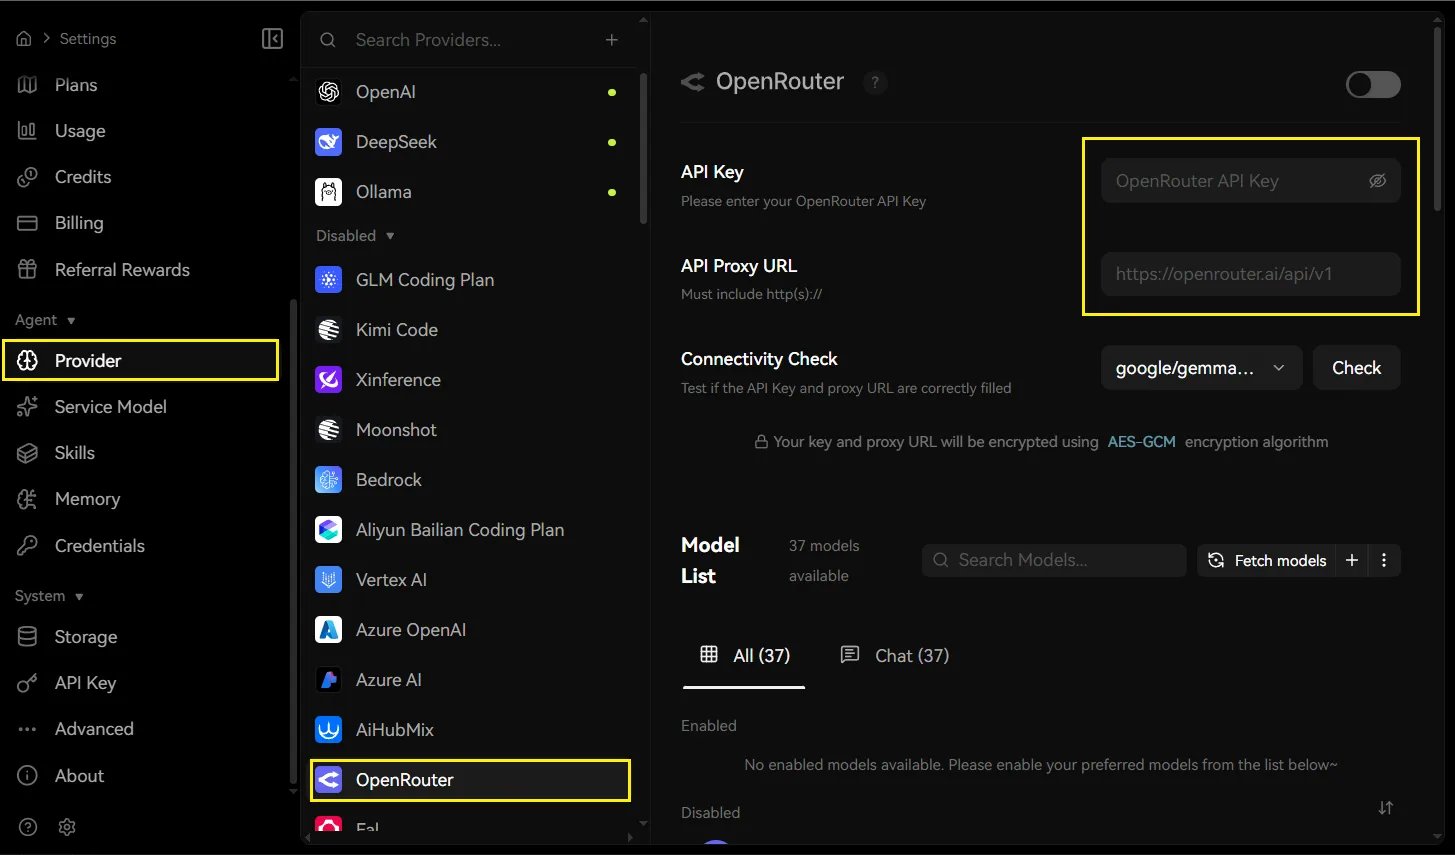 **API 配置参数**
| 字段 | 内容 |
| ------------- | --------------------------------------------- |
| API Key | 在 [x6.ai](https://x6.ai/settings/api-keys) 获取 |
| API Proxy URL | [https://api.x6.ai/v1](https://api.x6.ai/v1) |
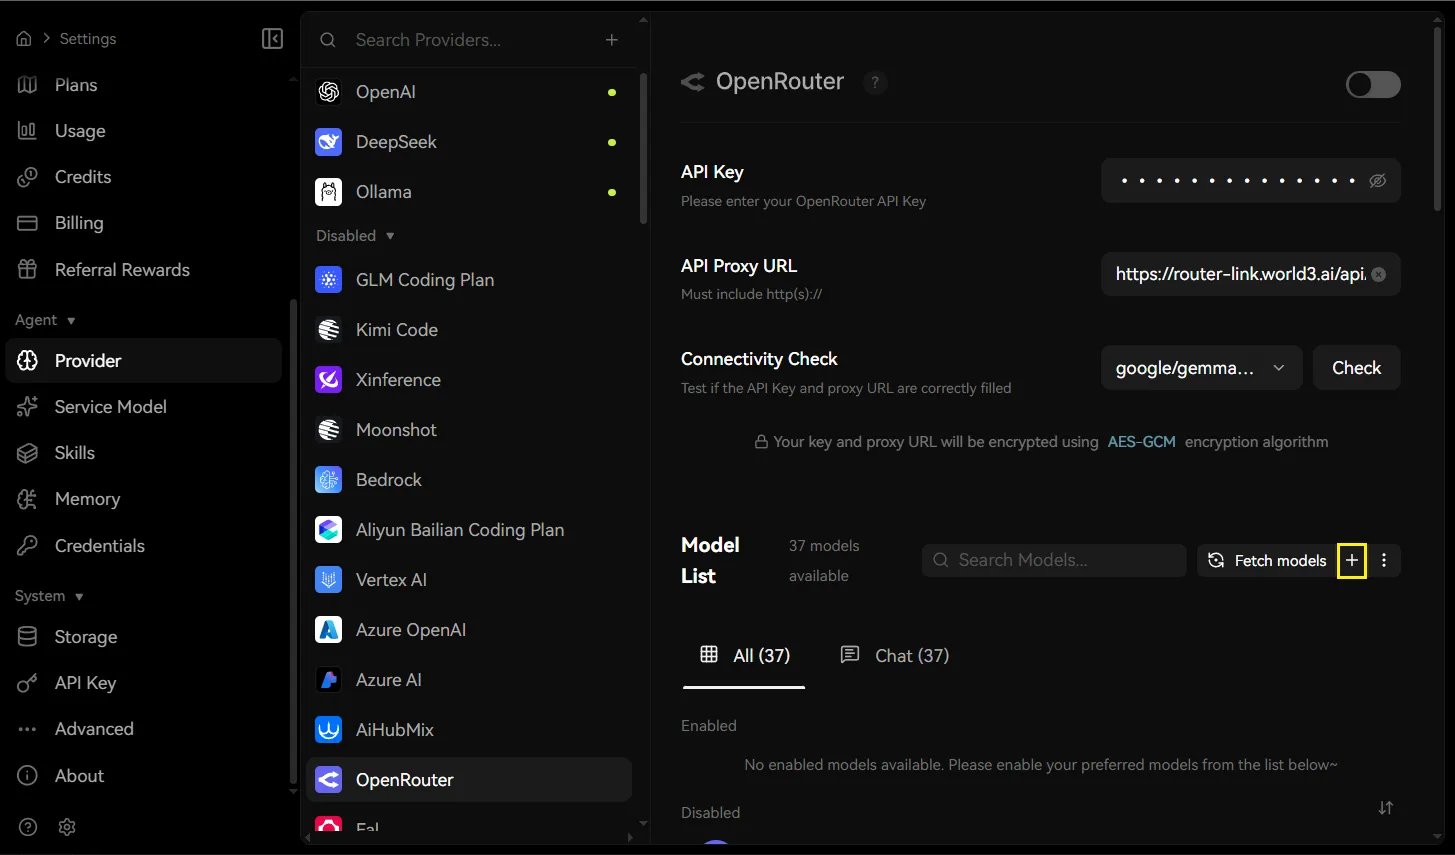
填入凭证后,点击旁边的 **"+"** 按钮添加自定义模型配置。
**API 配置参数**
| 字段 | 内容 |
| ------------- | --------------------------------------------- |
| API Key | 在 [x6.ai](https://x6.ai/settings/api-keys) 获取 |
| API Proxy URL | [https://api.x6.ai/v1](https://api.x6.ai/v1) |
填入凭证后,点击旁边的 **"+"** 按钮添加自定义模型配置。
 #### **模型注册**
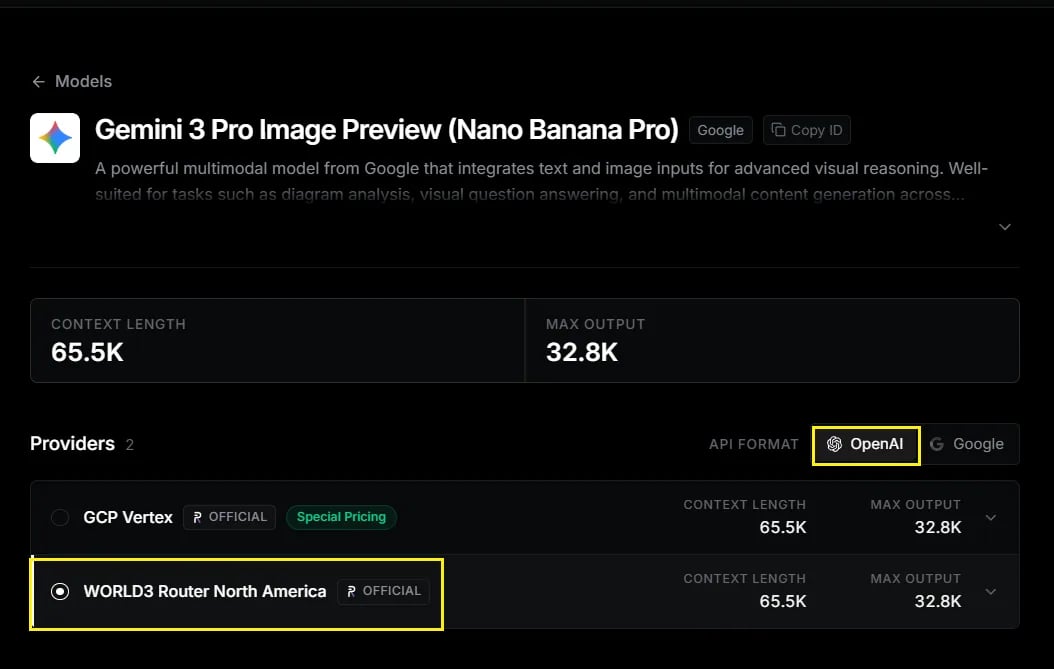
指定你希望使用的模型。本示例以 [**Gemini 3 Pro Image Preview**](https://x6.ai/m/Gemini%203%20Pro%20Image%20Preview%20\(Nano%20Banana%20Pro\)) 为例。
> 为获得最佳兼容性,请选择 **API 格式:OpenAI**。\
> Provider:**Default**
#### **模型注册**
指定你希望使用的模型。本示例以 [**Gemini 3 Pro Image Preview**](https://x6.ai/m/Gemini%203%20Pro%20Image%20Preview%20\(Nano%20Banana%20Pro\)) 为例。
> 为获得最佳兼容性,请选择 **API 格式:OpenAI**。\
> Provider:**Default**
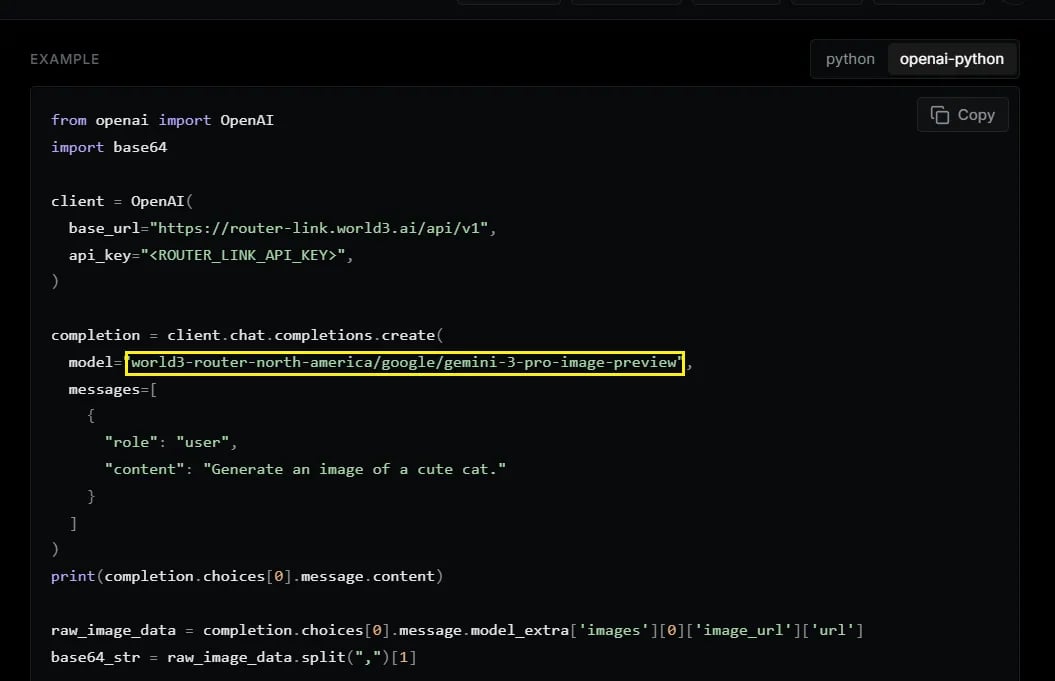
 **Model ID 格式:**
输入完整的 Model ID:
`gemini-3-pro-image-preview`
**Model ID 格式:**
输入完整的 Model ID:
`gemini-3-pro-image-preview`
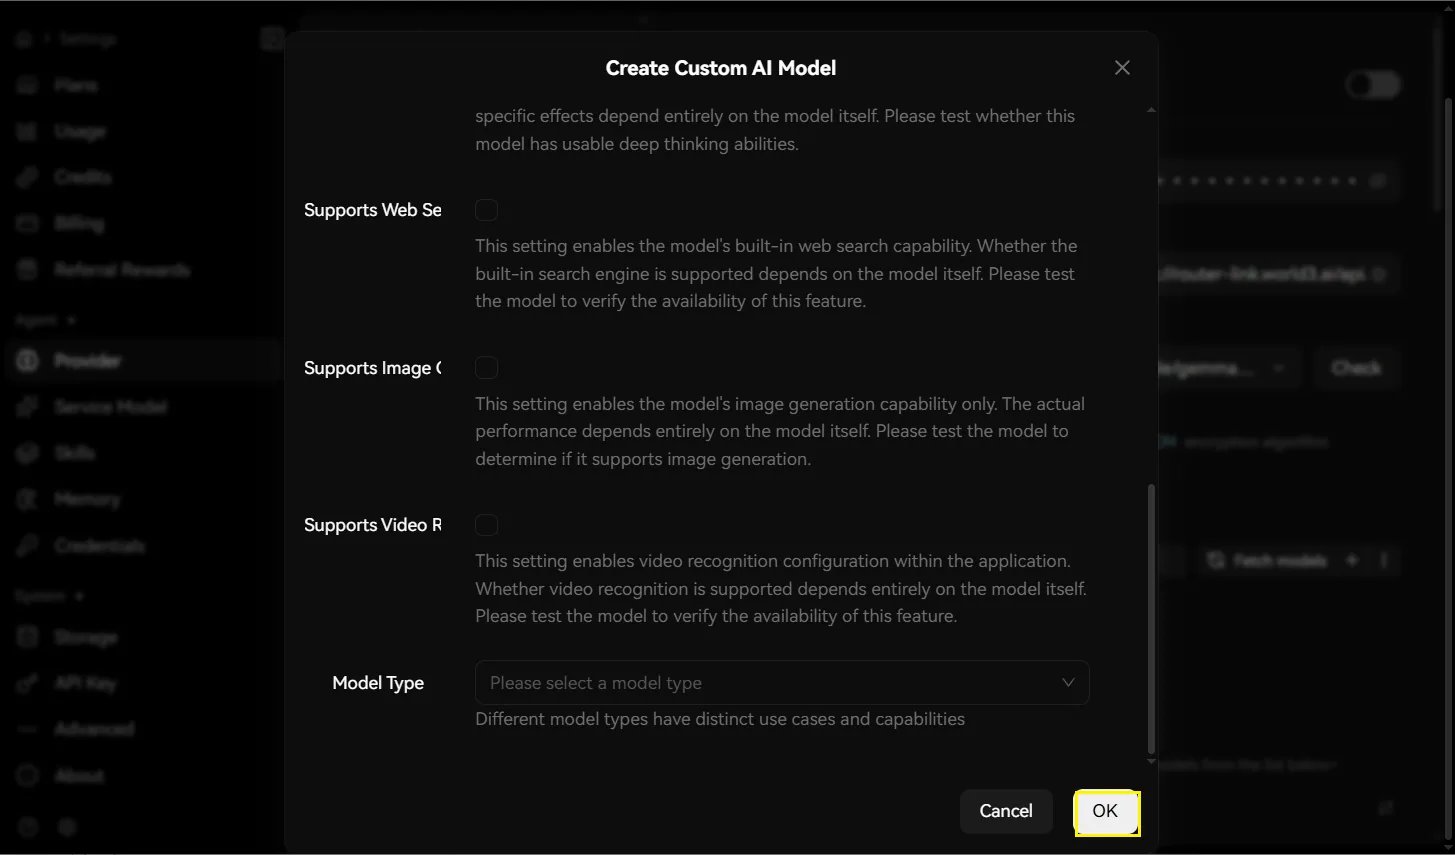
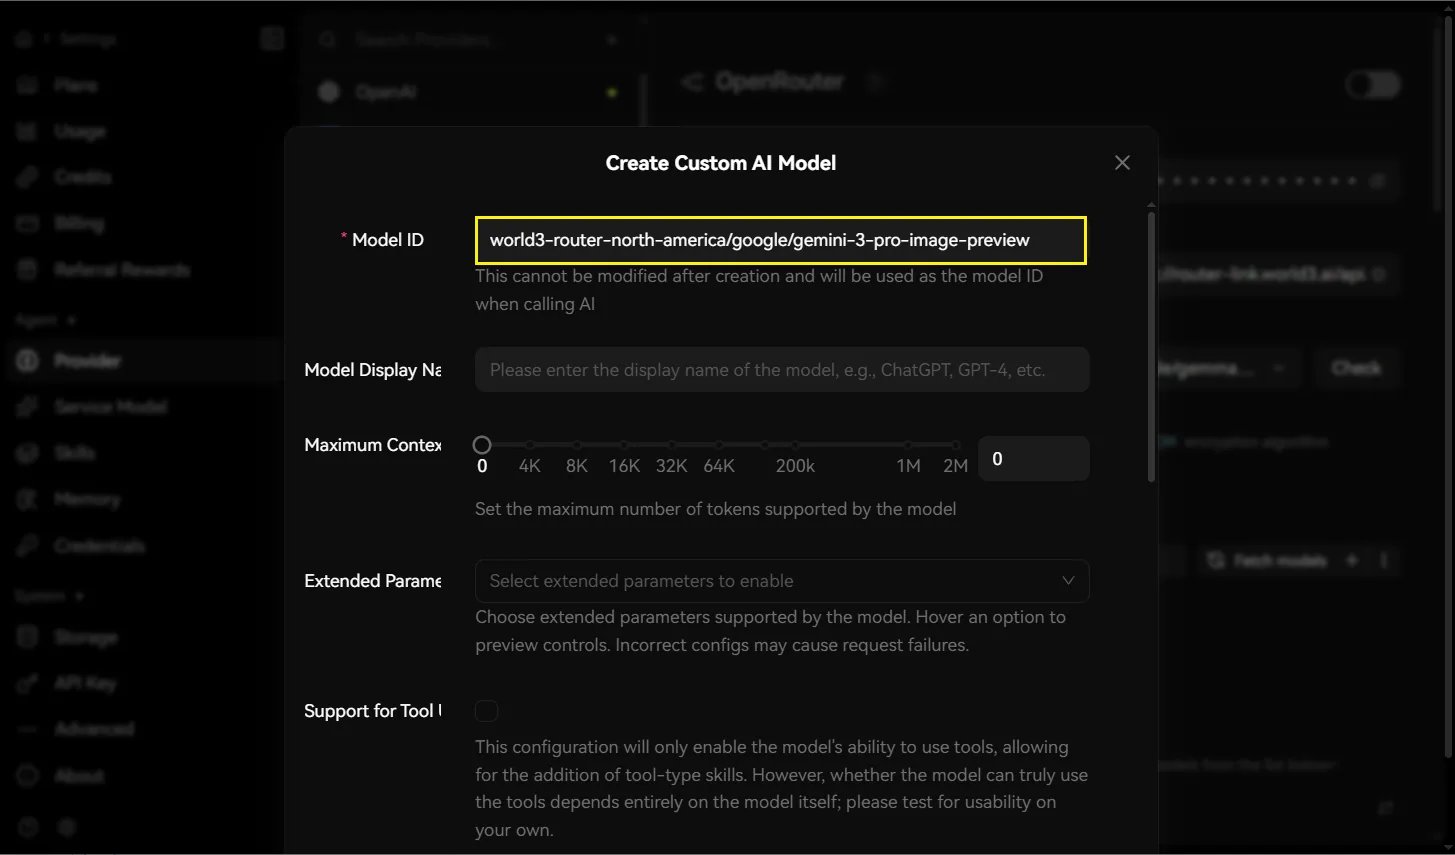 你可以在此配置相关参数,完成后点击 **"OK"**。
 ### **启用提供商**
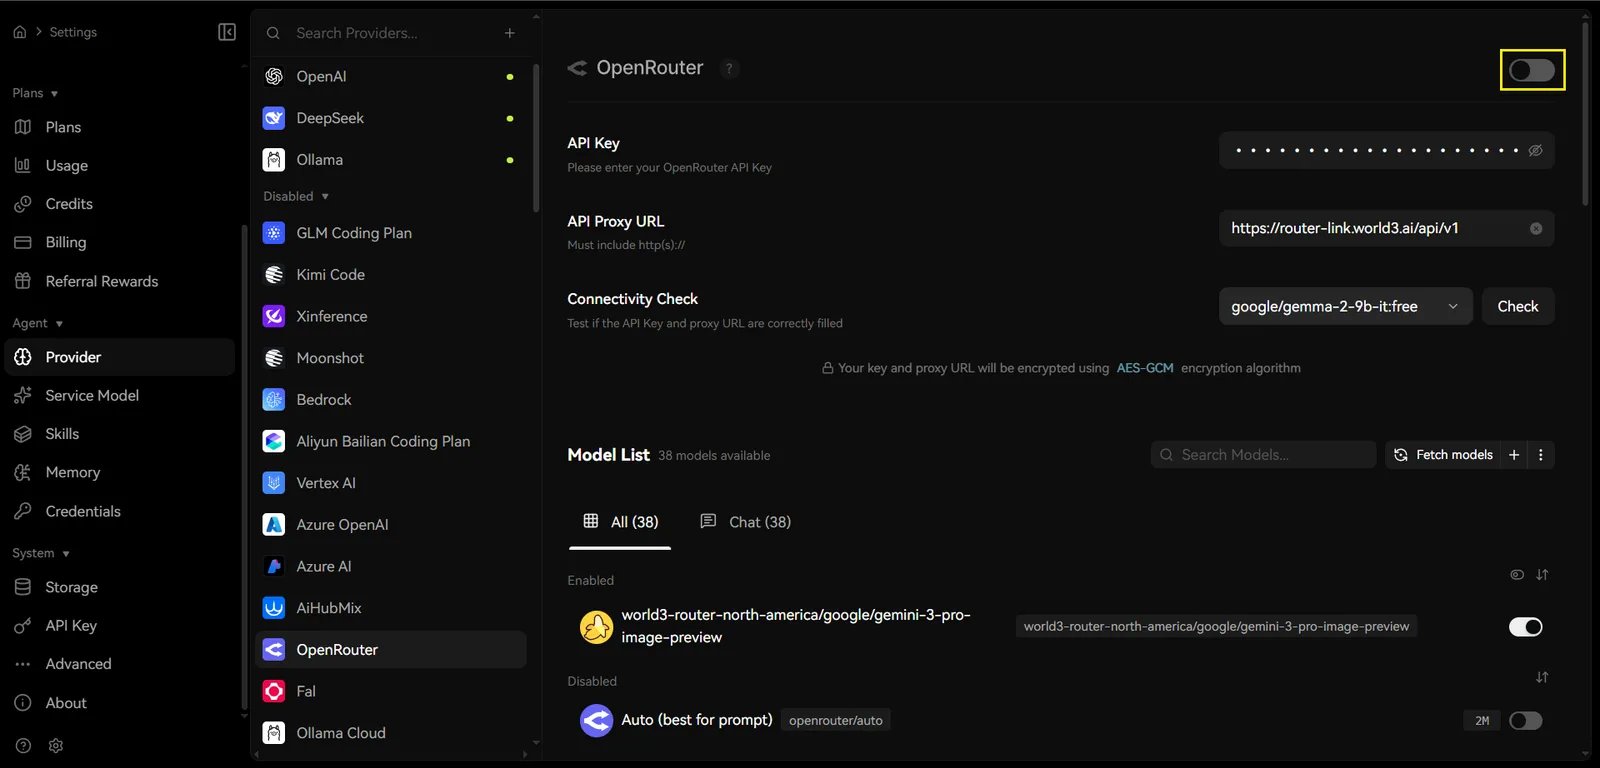
打开右上角的 **OpenRouter 主开关**,启用提供商连接。
### **启用提供商**
打开右上角的 **OpenRouter 主开关**,启用提供商连接。
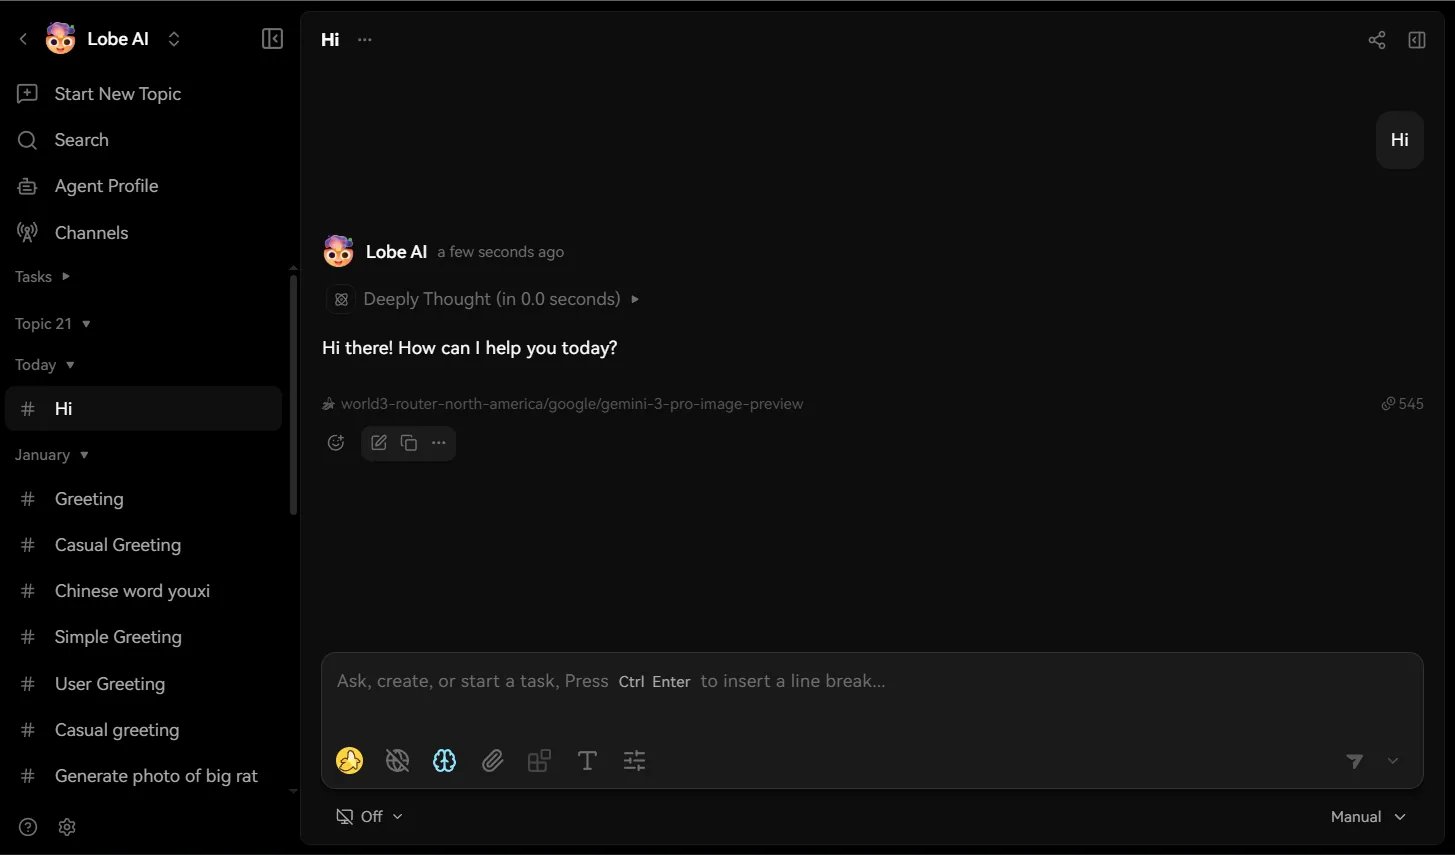
 1. 点击左侧边栏的 Home 按钮,在 OpenRouter 下选择一个模型。
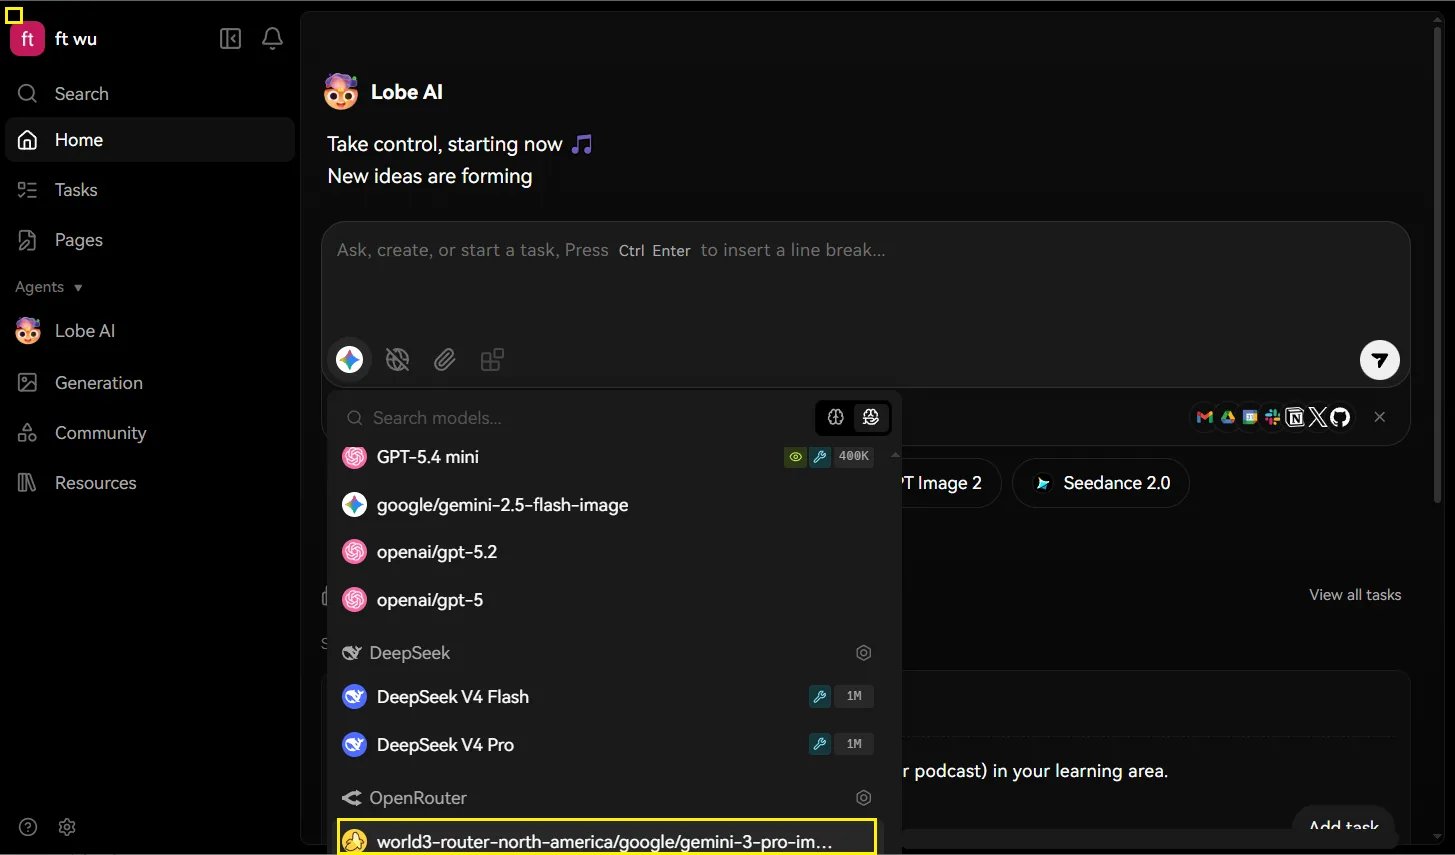 2. 现在即可开始使用。
 # **常见问题**
| **问题** | **解决方案** |
| --------- | ------------------------------ |
| **认证失败** | 检查 API Key 是否正确复制,前后没有多余空格 |
| **模型无响应** | 确认 Model ID 与 x6.ai 文档中的格式完全一致 |
| **连接超时** | 检查网络连接,并确认 API Proxy URL 正确 |
# **常见问题**
| **问题** | **解决方案** |
| --------- | ------------------------------ |
| **认证失败** | 检查 API Key 是否正确复制,前后没有多余空格 |
| **模型无响应** | 确认 Model ID 与 x6.ai 文档中的格式完全一致 |
| **连接超时** | 检查网络连接,并确认 API Proxy URL 正确 |